Today, Storage Area Network (SAN) is something that an big organizations or event the mid size can't survive without one. Richer media, much more data to be stored for financial regulation, analysis and trend analysis or event a simple BI reports...I'm not going to list out all the possibilities on why an organization need a centralized storage and at time IT will run into a situation where the pre-allocated disk partition 1 or 2 years ago just doesn't cope with the demands today....
There are many ways on how you can "fix" this issue from time to time, You can add a new partition into the server and have your date spitted into 2 partitions, but this will not always works due to the nature of some DB architecture and applications.
For any other OS you may use the SVG tool from HP to extend the disk partition without going to the hassle of recreating a new partition and move your data over from the old to the new one. I'm assuming you're using one of the storage product by HP...the concept and step will be the same even you're on EMC or some other storage vendors
For Microsoft Windows 2003 Servers families and above, you can use the handy tool which ship as part of the Windows installation to extend the partition "online". It is good to have your data fully backup before your attempt to do so.....I'm going to walk you thru the steps on how to extend the disk partition using the DISKPART utility :-
Prerequisite :- You need to login to the storage console to increase the LUN/Disk/vDisk size before you can extend from the Windows server. In this case, login to the Command View for HP Storage Works and select the vDisk(s) that you want to increase the size and click on OK button and wait for a moment for EVA to finish calculating and leveraging the new requested size...
From the Cluster Active Node, perform the following steps :-
1. From the active node command prompt, run DISKPART utility
2. You are at the diskpart utility prompt DISKPART>
3. DISKPART> prompt, type "select disk X" where X is the disk number that you want to extend
4. DISKPART> prompt, type "detail disk" to ensure that you are at the correct disk
DISKPART> select disk 5
Disk 5 is now the selected disk.
DISKPART> detail disk
HP HSV210 Multi-Path Disk Device
Disk ID: 12F906BF
Type : FIBRE
Bus : 0
Target : 0
LUN ID : 3
Volume ### Ltr Label Fs Type Size Status Info
---------- --- ----------- ----- ---------- ------- --------- --------
Volume 13 I XXXXXX NTFS Partition 1500 GB Healthy
5. DISKPART> prompt, type "select volume Y" where Y is the volume number that you want to extend
DISKPART> detail volume
Disk ### Status Size Free Dyn Gpt
-------- ---------- ------- ------- --- ---
* Disk 0 Online 149 GB 0 B
Read-only : No
Hidden : No
No Default Drive Letter: No
Shadow Copy : No
Dismounted : No
BitLocker Encrypted : No
Volume Capacity : 22 GB
Volume Free Space : 2844 MB
6. DISKPART> prompt, type "extend"
DiskPart> successfully extended the volume.
Well..... this actually works on the Windows 2003 32 bits Enterprise Server as well. Now, launch Windows Explorer to ensure that the database, files and application is working fine.....
Wednesday, December 24, 2008
First Look at Windows Server 2008 Server Core - Part II
It has been a while I posted the Part I of the article but I have not have time for part II sooner....now here you go for Part II, which will pretty much cover how to activate your Windows Server 2008 Server Core from the shell instead of the usual few clicks away kind of GUI interface....
Microsoft has been packaging the product activation in all recent Windows releases to protect their intellectual properties and prevent illegal copies from getting the latest patches from the MS web site.
By running Windows Server 2008 Server Core doesn't mean you can get around the pruoduct activation. In Windows Server 2008 Server Core you can activate your server either locally or remotely. Either way uses the Software Licensing Management Tool - Slmgr.vbs
To activate from the local shell following the steps below :-
start /w slmgr.vbs -ipk ABCDE-12345-FGHIJ-67890-KLMNO
start /w slmgr.vbs -ato
Replace ABCDE-12345-FGHIJ-67890-KLMNO with you own prodict key and the - ato switch will then activate it for you
To activate from the remote shell or remote computer, follow the steps below :-
cscript windows\system32\slmgr.vbs SERVERNAME USERNAME PASSWORD:-ato
Thursday, October 23, 2008
Retrieve Cluster Disk Signature on x64 Windows System
You can retrieve cluster disk signature information on x64 system where the 32bits version of dumpcfg isn't compatible or return empty values.
The alternative tool for dumpcfg on the 64 bits Windows system will be diskpart utility which is part of the OS installation. I will walk you thru it from the following steps :-
1. From command prompt type DISKPART
2. You are at the diskpart utility prompt DISKPART>
3. DISKPART> prompt, type "select disk X" whre X is the disk number you are looking at
3. DISKPART> prompt, type "detail disk"The "Disk ID: " value is the disk's signature.
DISKPART> select disk 0
Disk 0 is now the selected disk.
DISKPART> detail disk
HP LOGICAL VOLUME SCSI Disk Device
Disk ID: DD39801D
Type : RAID
Bus : 0
Target : 4
LUN ID : 0
Volume ### Ltr Label Fs Type Size Status Info
---------- --- ----------- ----- ---------- ------- --------- --------
Volume 1 C C_LOCAL_SYS NTFS Partition 137 GB Healthy System
DISKPART> select disk 5
Disk 5 is now the selected disk.
DISKPART> detail disk
HP HSV210 Multi-Path Disk Device
Disk ID: 12F906BF
Type : FIBRE
Bus : 0
Target : 0
LUN ID : 3
Volume ### Ltr Label Fs Type Size Status Info
---------- --- ----------- ----- ---------- ------- --------- --------
Volume 13 I XXXXXX NTFS Partition 1500 GB Healthy
Sample output above shows that the disk 0 is the local disk on HP Smart Array and disk 5 which is a SAN Virtual Disk or LUN from the HP HSV 210 Controller which is the EVA 8000 with multi-path capabilty.
The cluster disk signature for the local and remote disks are the one marked in RED
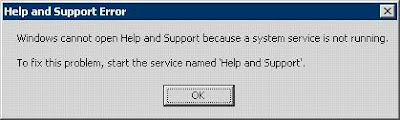
Help and Support Feature Missing After Windows 2003 SP2 Installation
This is the know issue for Microsoft Windows below :-
BUT.....we faced the exact same problem in the Windows 2003 Enterprise Edition
Screen capture below show the error when you try to start the Help and Support service manually from the command line by msinfo32.exe or helpctr.exe
Follow steps below to resolve this issue :-
1. Open Command Prompt.
2. C:\Windows\PCHealth\HelpCtr\Binaries or your Windows directory %windir%
3. Run "start /w helpsvc /svchost netsvcs /regserver /install"
4. You should be able to see the Help and Support service the MMC Services Console
5. If it is not already started, start it manually by right click on the service name ans Start
That's it
- Microsoft Windows Small Business Server 2003 Premium Edition
- Microsoft Windows Small Business Server 2003 Standard Edition
- Microsoft Windows Small Business Server 2003 R2 Premium Edition
- Microsoft Windows Small Business Server 2003 R2 Standard Edition
BUT.....we faced the exact same problem in the Windows 2003 Enterprise Edition
Screen capture below show the error when you try to start the Help and Support service manually from the command line by msinfo32.exe or helpctr.exe

Follow steps below to resolve this issue :-
1. Open Command Prompt.
2. C:\Windows\PCHealth\HelpCtr\Binaries or your Windows directory %windir%
3. Run "start /w helpsvc /svchost netsvcs /regserver /install"
4. You should be able to see the Help and Support service the MMC Services Console
5. If it is not already started, start it manually by right click on the service name ans Start
That's it
Wednesday, October 1, 2008
First Look at Windows Server 2008 Server Core - Part I
One of the beatiful feature of Windows 2008 is its ability to deploy as the Server Core machine. This installation of Windows 2008 provides a minimum environment for running specific server roles such as :
- Active Directory Domain Services (AD DS)
- Active Directory Lightweight Directory Services (AD LDS)
- DHCP Server
- DNS Server
- File & Print Services
- Internet Information Services (IIS)
- Streaming Media Services
- Virtualization (Hyper-V)
The Standard edition of Windows Server 2008 is probably the best option for Server Core based deployment because most of the advanced features available in Enterprise & Data Center editions will not be present in Server Core.
In Windows Server 2008, Server Core installation will not have the usual UI for administration purposes. This is pretty much revamped the way MS is looking at fully UI based administration. Some of the basic UI available in Server Core include regedit, notepad, task manager, date time & reginal setting.
Why Server Core ?
The Goods
- Reduced Surface of Attack - Due to the nature of this installation, it only has the minimum set of programs which decreases the attack surface.
- Ease of Maintainance - Because less programs are running in this installation, so the need to catch up with the patches and KBs are significant reduced.
- Less Disk Space Required - The Server Core installation require only 1.5 GB for installation and another 1.5 GB for operations
- Administration & Management - For those that like a fast and 'real' way of getting the instruction into the servers may not have problem with the CLI. But for a pure Windows Administrators which never have they hands on Unix like administration will find Server Core hard to manage.
- Upgrade Path - There is no way to upgrade from a Server Core installation to a full installation of Windows Server 2008.
- Minimum list of features supported - Not all of the Windows 2008 supported features are available in Server Core.
Thursday, August 28, 2008
MS DPM & DCOM Launch Permission
Recently we’re evaluating the MS Data Protection Manager short for MS DPM. In the POC phase of the project we’re able to remotely deploy the DPM client to the test machines. Sample snapshots has been created and everything seem to be worked just right.
But when we try to restore from the VSS we uncounted some error which generate some of these system events :-

This is the event log from the DPM server

This was generated when we tried to manage the remote client from the DPM Console
Looking at the event source, it was generated by DCOM, so we checked the permissions on the DCOM Configuration Manager è DCOM Config :-
=> Microsoft Volume Shadow Copy Service software provider
=> MSDPM Agent Coordinator Service
=> Microsoft Volume Shadow Copy Service software provider
=> MSDPM Agent Coordinator Service
=> MSDPM Task Executor Application
1. Click on Start menu, select Run and type in dcomcnfg
2. Go to Component Services è Computers è My Computer è DCOM Config
1. Click on Start menu, select Run and type in dcomcnfg
2. Go to Component Services è Computers è My Computer è DCOM Config

3. Check to ensure that local and remote launch permission for the 3 DPM related services to have SELF & SYSTEM account in it
4. Check to ensure that the MS DPM Client hostname are part of the DCOM user group for the MS DPM Server
5. Reboot the MS DPM client machines and that should fix the DCOM error mentioned above
The Case of Windows 2003 SP2 Installation Failure
MS announces EOS of Windows 2003 Server with SP1 April 2009. So it is about time for the company I work for start to plan for an upgrade to SP2. We have around 1300 servers to be patched with combination of x86 and x64. I was part of the early involvement team to drive for this change and working with our engineering team for proliferation world wide.
We encountered this same exact error where SP2 failed to install with a very specific error code from update.exe
“Service Pack 2 Setup canceled.
Update.exe extended error code = 0xf00d
Update.exe return code was masked to 0x643 for MSI custom action compliance.”
Screen thru the svcpack.log, setupapi.log & spuninst.log and MS KB searches, this could due to the permission or antivirus with online scan for I/O.
We invoked the upgrade process using the local administrator account and that pretty much ruled out that it was due to permissions. But to be sure we checked on the local security policy on what exactly local administrator can and can’t do (with policy pushed from AD).
After that we reverted the change by restoring the mirrored disk and try it from scratch again. This time we disabled the VirusScan Enterprise 8x “On Access Scan” feature and proceed with the SP2 setup again and the update.exe error didn't went away but this time it reported more error with 0x490 on possibly all the inf files under the C:Windows\inf directory.
Below is part of the svcpack.log file error messages in C:\Windows
SetupVerifyInfFile failed with error 0x490 for c:\windows\inf\netwlbsm.inf of device ROOT\MS_WLBSMP\0000
SetupVerifyInfFile failed with error 0x490 for machine.inf of device ROOT\RDPDR\0000
SetupVerifyInfFile failed with error 0x490 for machine.inf of device ROOT\RDP_KBD\0000
SetupVerifyInfFile failed with error 0x490 for machine.inf of device ROOT\RDP_MOU\0000
SetupVerifyInfFile failed with error 0x490 for machine.inf of device ROOT\SYSTEM\0000
SetupVerifyInfFile failed with error 0x490 for machine.inf of device ROOT\SYSTEM\0001
SetupVerifyInfFile failed with error 0x490 for c:\windows\inf\machine.inf of device ROOT\SYSTEM\0001 SetupVerifyInfFile failed with error 0x490 for machine.inf of device ROOT\SYSTEM\0002
SetupVerifyInfFile failed with error 0x490 for disk.inf of device SCSI\DISK&VEN_HP&PROD_LOGICAL_VOLUME&REV_2.58\5&12B8725B&0&040
SetupVerifyInfFile failed with error 0x490 for disk.inf of device SCSI\DISK&VEN_HP&PROD_LOGICAL_VOLUME&REV_2.76\5&12B8725B&0&040
This time the error message tell some informative hint where update.exe unable to verify the inf files and a quick search on the log enteis from Process Monitor suggested that licdll.dll is throwing the problem. KB912354 from MS outlined that this can be easily fixed by reregister the problematic dll by regsvr32 licdll.dll but this is not enough to fix the problem we faced in this server.
We proceeded to download the KB912354 and from MS Premier site to replace the dll and then performed the following steps to recovered the server and get SP2 installed :-
- Patch KB912354 & reboot the system
- Net stop cryptsvc
- ren C:\Windows\System32\Catroot2 oldcatroot2
- Net start cryptsvc
- Reinstall SP2
Subscribe to:
Posts (Atom)
